
How to Add Moonbeam Network (GLMR) to Metamask?
Let’s learn how to add Moonbeam network to MetaMask wallet
Add Moonbeam (GLMR) to Metamask
To add Moonbeam network to MetaMask, follow these steps:
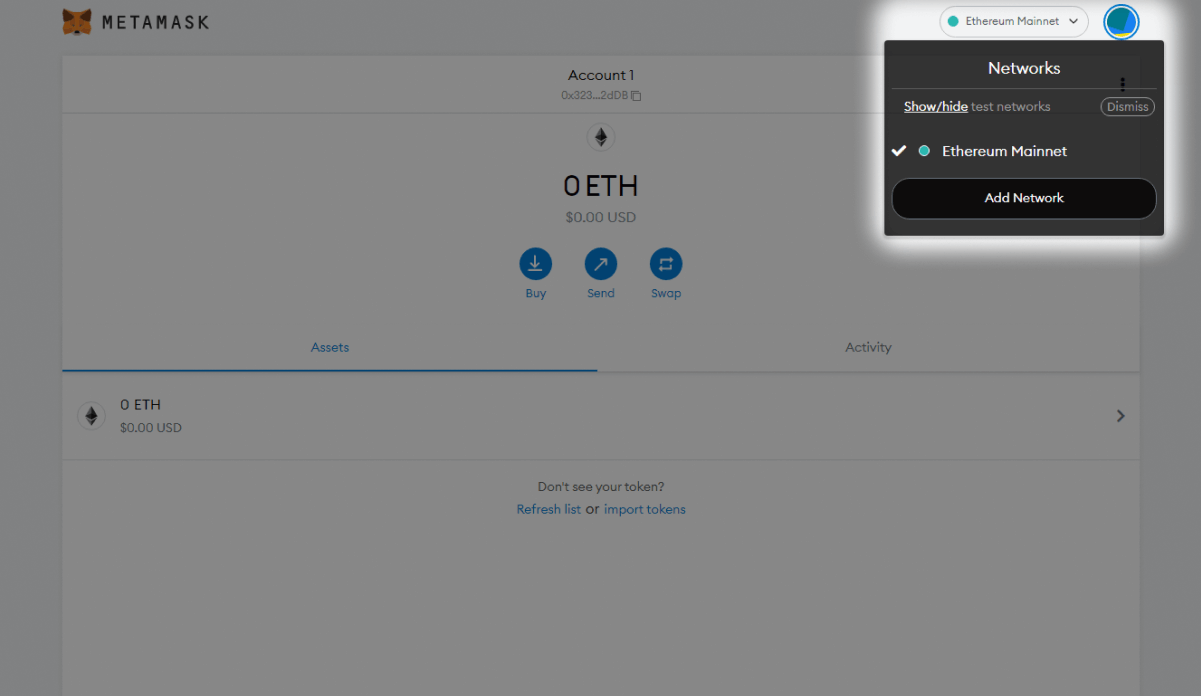
2. In case of a new MetaMask wallet the default network is set to Ethereum Main-net. Click on the network tab located on the top right and then select the ‘Add Network’ option.

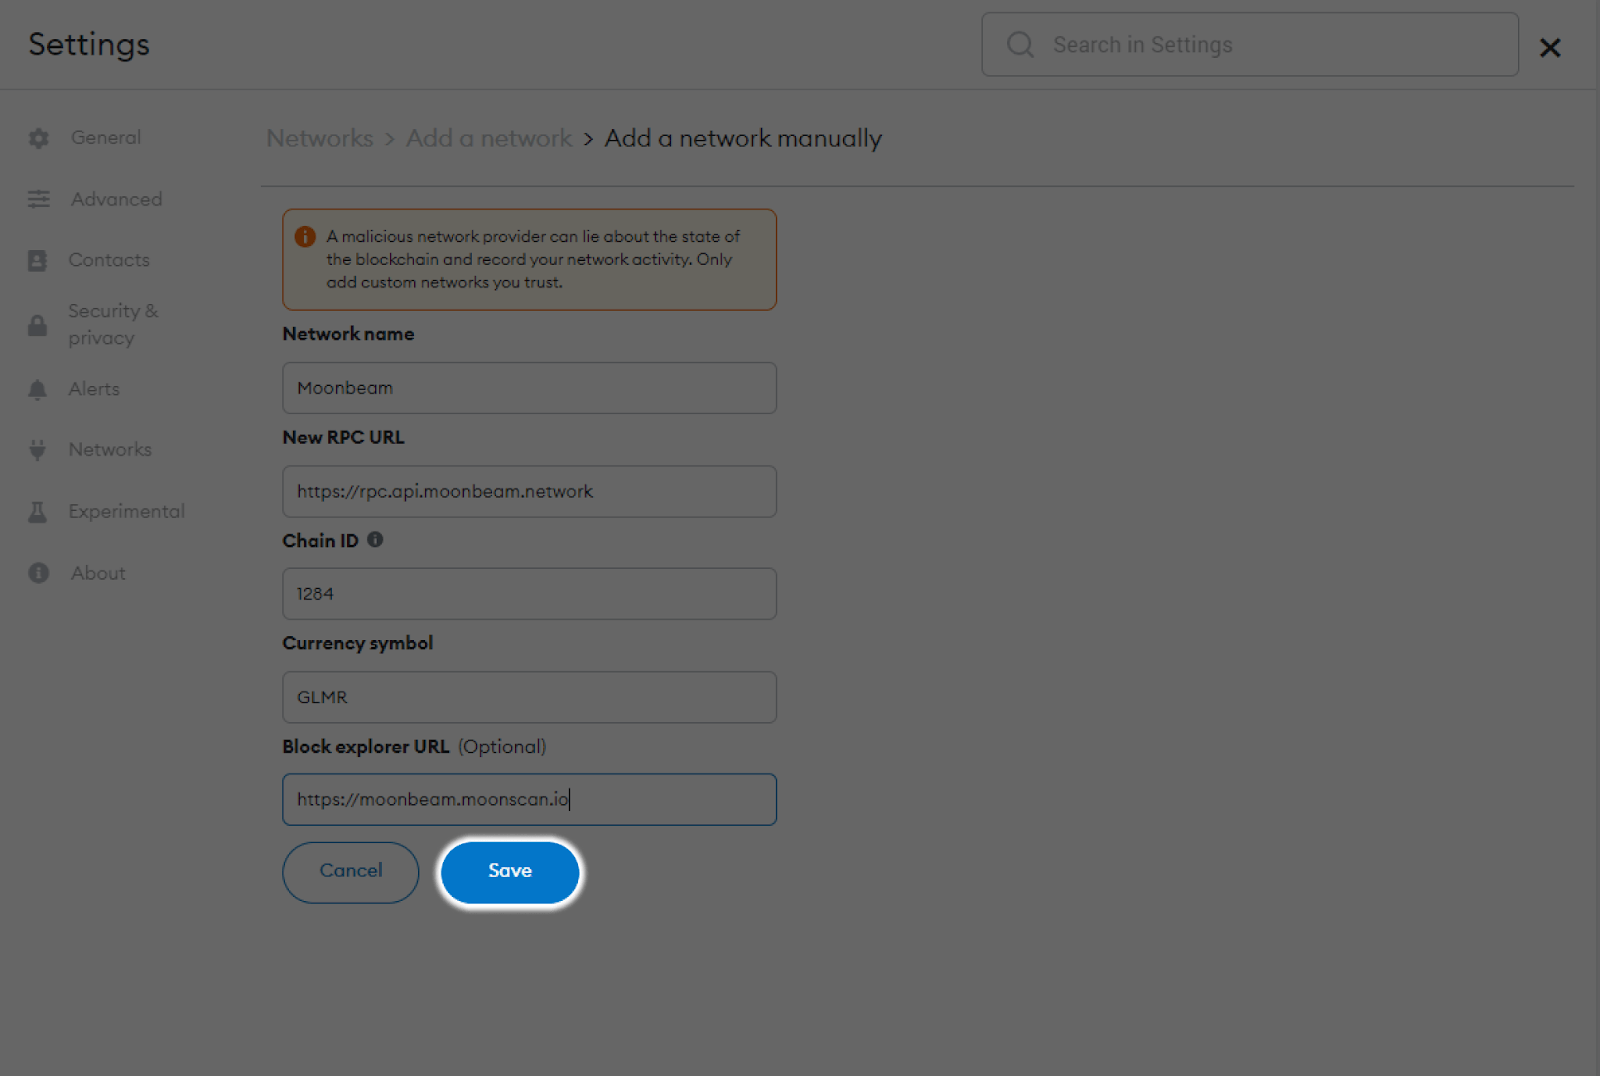
3. To add Moonbeam network to MetaMask fill in the following details under the ‘Add Network’ window.
Network Name: Moonbeam
New URL: https://rpc.api.moonbeam.network
Chain ID: 1284
Currency Symbol: GLMR
Block Explorer URL: https://moonbeam.moonscan.io
Click on Save when done

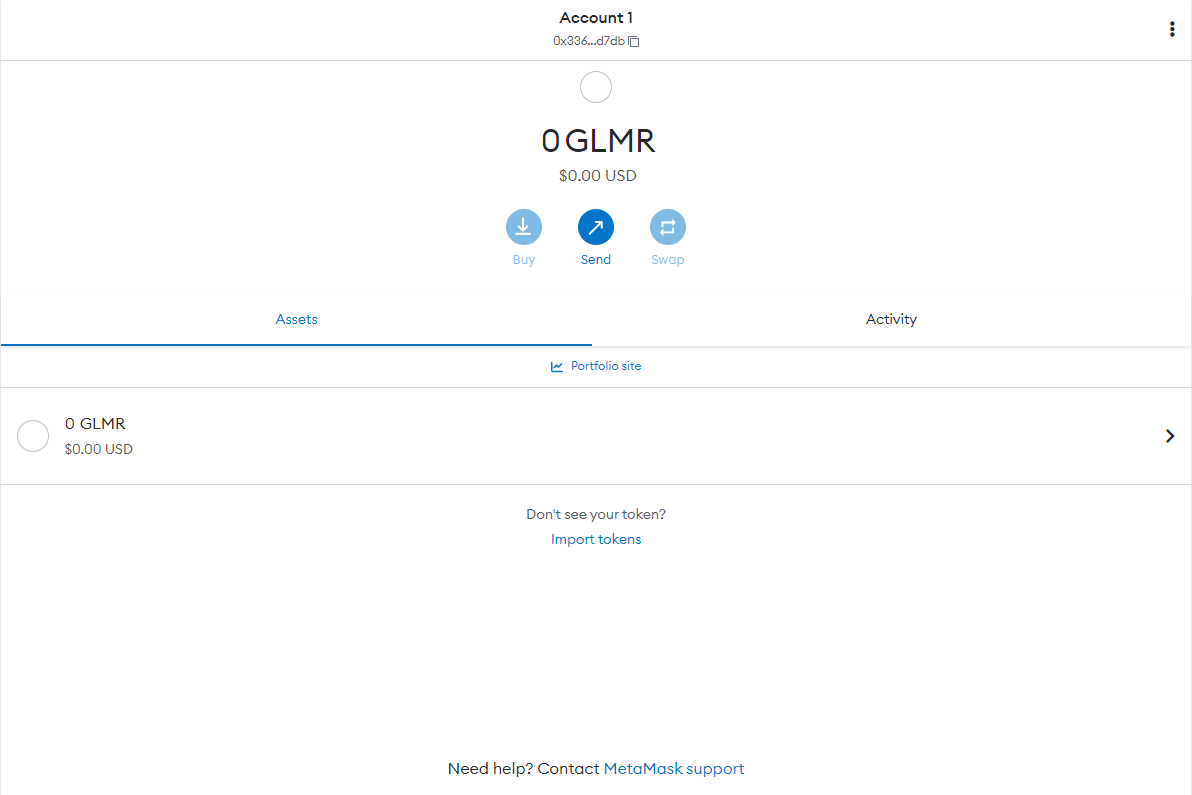
After completing all the steps the network will be added making your MetaMask on Moonbeam network look like this:

That’s it! You can now start trading with the Moonbeam MetaMask network.
Answering some FAQs about Moonbeam (GLMR):
Is Moonbeam free to add?
Yes, the Moonbeam token is free to add to your metamask wallet. However to start trading you will need to buy some quantity.
What blockchain is Moonbeam on?
Moonbeam is an Ethereum-compatible smart contract parachain on Polkadot.
What are the uses of Moonbeam (GLMR)?
Moonbeam has several uses. First, it offers its users an option to stake and rewards them for securing the network. Second, Moonbeam can also be used to create new dApps leveraging the Polkadot ecosystem. Lastly, Moonbeam users can also participate in the on-chain governance process.
(Also read: How to add BNB Network To Metamask.)
(Also read: Moonbeam Network 2023 Metrics.)
